
Works In Progress- otherwise known as a W.I.P
An Introduction- to WIP’s
Look for the heading WIP with a title attached in future. An example is- ‘WIP of Cider With Bite DV346′ which is what I am writing about today.
Here you can see and read about one of the processes I use when I am working on a painting. I hope you enjoy seeing a little of what it is all about.
This is the beginning of a short version of a WIP of mine in Watercolour. When I painted Cider With Bite back around 2010, I forgot to take photos of the very beginning, right back just after the drawing stage.
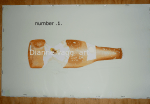
The first photo shows about 3 layers of paint washes on the bottle itself, It is worked wet in wet, allowing the colour to move and blend, after this I moved onto the Apple within. The first section to do was the core itself, again starting with lighter colours, to get the area marked as I wanted it before making it the intensity that I wanted.
Painting in this order lets me see exactly what goes where, it helps to keep it all in proportion.
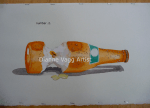
Here I have continued to add more washes of the same colour on the bottle to create a 3D appearance before starting on the apple. I painted it this way so that I could see where I was more easily, than if I had left the bottle unpainted.
Note the condensation on the bottle, this was created by using a masking fluid that rubs off once I have finished painting around the area to preserve the very small marks. This was also done to create the crimping around the cap.
The shadow running along under the length of the bottle was done separately and very lightly, initially just to show where its margins are. Further along I adjusted the strength of the colour.
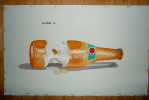
Next I started with the shadow of the bite mark at the bottom of the apple, building up gradually with very light gray washes in various places over the entire apple to indicate where it was bitten into and give it shape.
When I was happy with that I put the label on and added the water drops and did an overall check, adjusting here and there by either adding or removing a little paint. When I feel that I am finished I like to leave my work where I can view it for a few days, just to make sure that I haven’t missed anything, then I sign it.
The last thing is taking it off the board. (very carefully- I don’t want to tear the paper or put a hole in it) I have stapled the paper to a painting board that is just a nice size for working on it.) If I should slip with the screwdriver it would be disastrous. Once that is done I can organize a mount and frame for it.
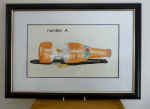
Here I chose a black frame that will look good pretty much anywhere. The code for this one is DV388 and it measures 54.5 x 40cm with its mount but unframed.
Let me know if you like this post and add a comment, if you would like to see more, thank you for being here, Dianne.

